Paypal Integration
Head over to Razorpay Dashboard and create and account. Once you are on the dashboard:
- Click on “Account & Settings” -> “API Keys” and generate a new key. (You will have the possibility to download the key or copy it).
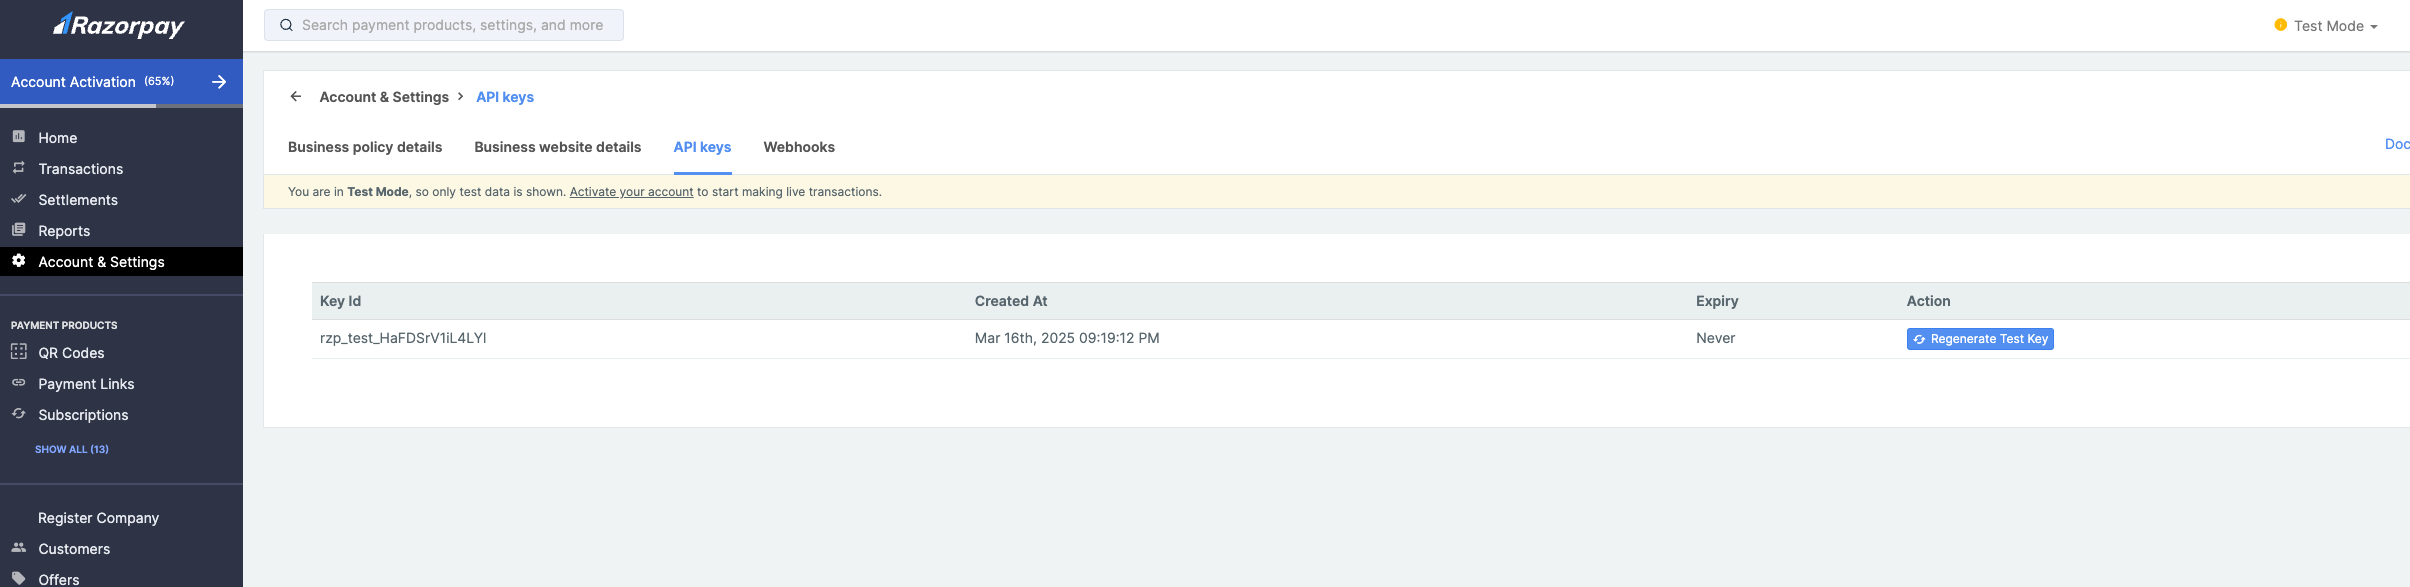
You will have a Key ID and a Key Secret.
You will need to add the following environment variables to the NodeJS server:
RAZORPAY_KEY_ID= <your-key-id>
RAZORPAY_SECRET_KEY= <your-key-secret>
You will need to add the following environment variables to the web application (NextJS app):
NEXT_PUBLIC_RAZORPAY_KEY_ID= <your-key-id>- Add webhook to the NodeJS server. Navigate to the “Webhooks” section and add a new webhook.
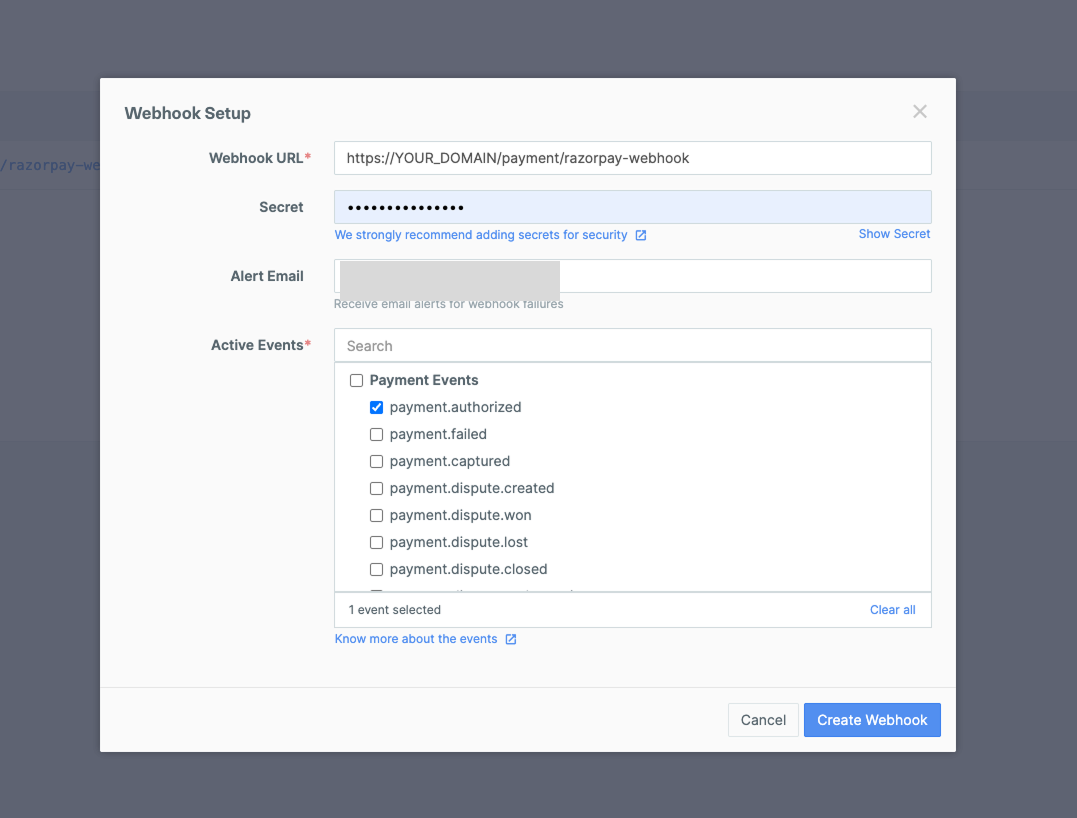
Make sure that in the “Webhook URL” input, you need to add the URL of the server, followed by /payment/razorpay-webhook.
For example, if the server is running on http://localhost:7777, the webhook URL should be http://localhost:7777/payment/razorpay-webhook.
Make sure you add a Secret Key to the webhook and add the same key in the NodeJS server environments like this:
RAZORPAY_WEBHOOK_SECRET= <your-webhook-secret>For Active Events, make sure you select the payment.authorized event.
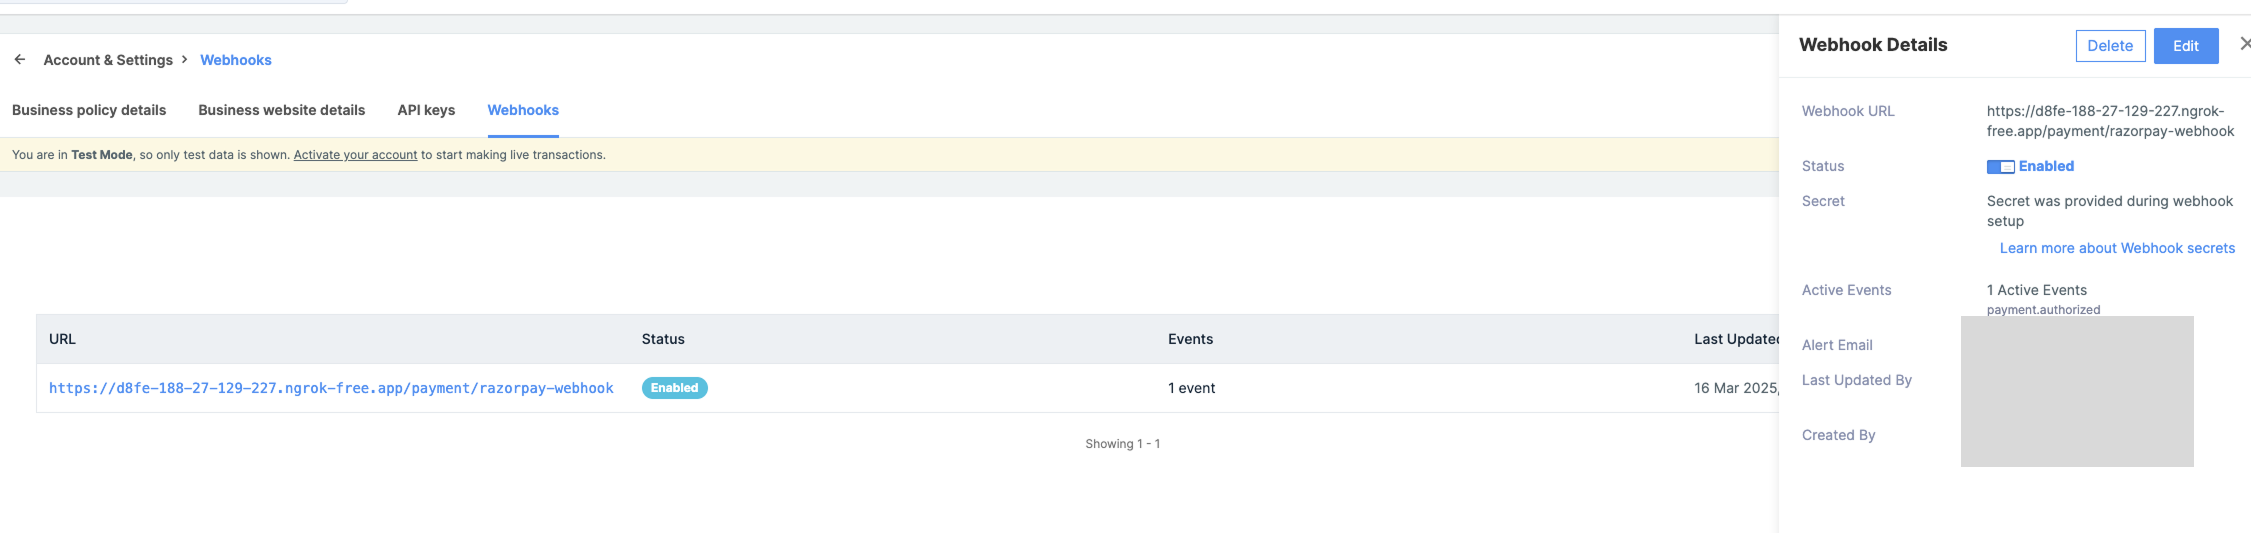
- Make sure that the webhook is active.
- Test the integration
For testing purposes, you can use the following card details:
Card Number: 4111 1111 1111 1111
Expiry Date: Any future date
CVV: Any 3 digits